Your site is live, your content looks amazing, and you’re officially out in the online world! There’s just one last thing we recommend doing to ensure your site’s success: let Google know it exists.
This is where Google Search Console (aka your behind-the-scenes SEO sidekick) comes in.
What Is Google Search Console?
Google Search Console is an SEO tool Google offers that monitors and maintains your website’s presence in Google search results. It gives you insights into how your site is performing in search, and helps you spot potential issues or areas for improvement on your website. It’s also completely free to use, you just need a Google account to get started!
Google Search Console is super handy for:
- Seeing what keywords people use to discover your site
- Tracking increases in website traffic
- Knowing which website pages will show up in search results
Another one of its most useful features is the ability to submit your sitemap. Your sitemap is a file that lists all the important pages on your site, and submitting it in Google Search Console tells Google to look through your site pages and show them in search results. Doing this helps your content get discovered faster and ensures search engines understand your site structure.
It’s important to set up Google Search Console under your own business or organization’s account because you’ll retain full ownership and control of the data. If it’s created under a third-party agency’s account, you could lose access to important insights or run into issues if you ever switch providers (though we’re happy to walk you through it!).
This tool is easy to set up, just follow the quick steps below to get started.
We’re going to start with instructions for Squarespace websites, so you can skip ahead if you have a WordPress site!
If You Have a Squarespace Site
Connecting Google Search Console to your Squarespace site lets you view valuable search data like which keywords are driving traffic, right inside your Squarespace dashboard. This saves you time and makes it easier to optimize your site without switching between tools.
Step 1: Add Google Search Console to Squarespace
- Log in to your Squarespace dashboard
- In the Home menu, on the left hand side click Analytics.
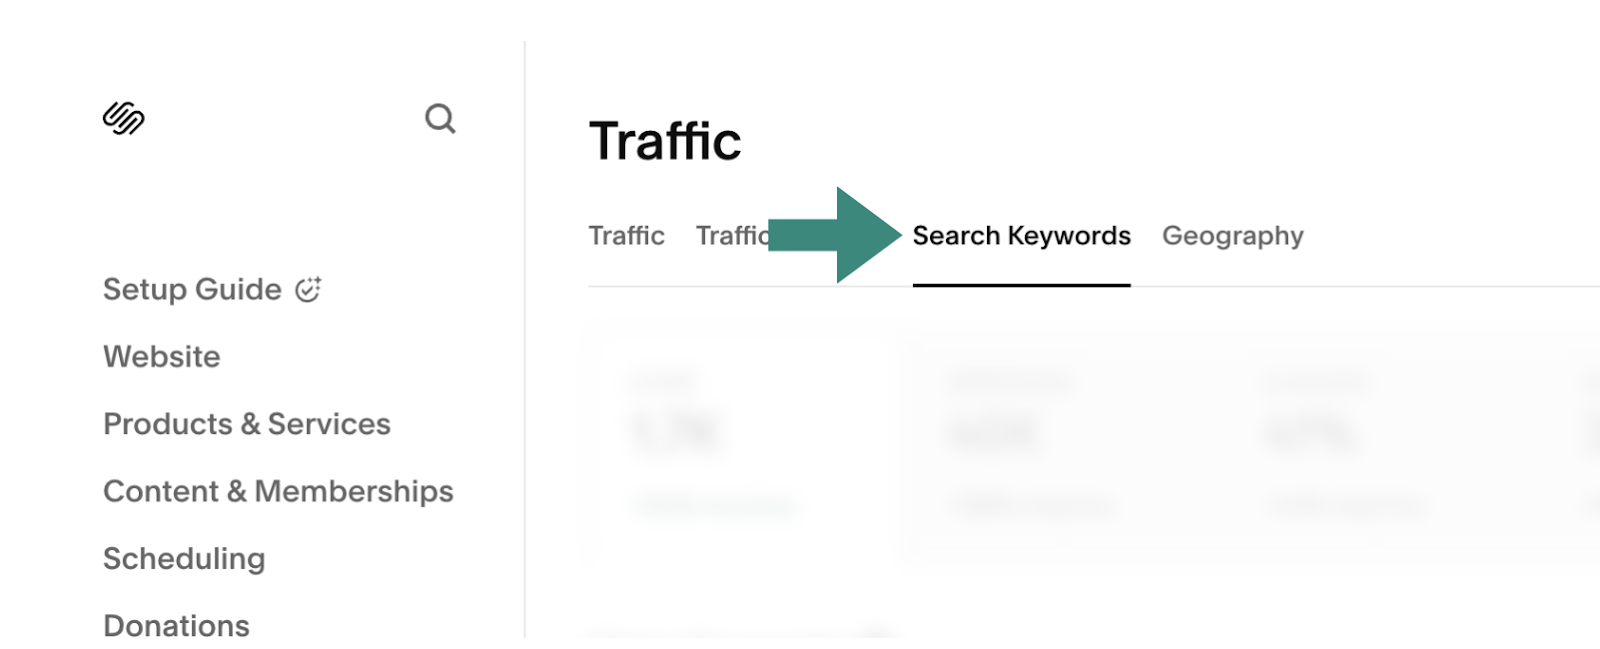
- Under Traffic, select Search Keywords.
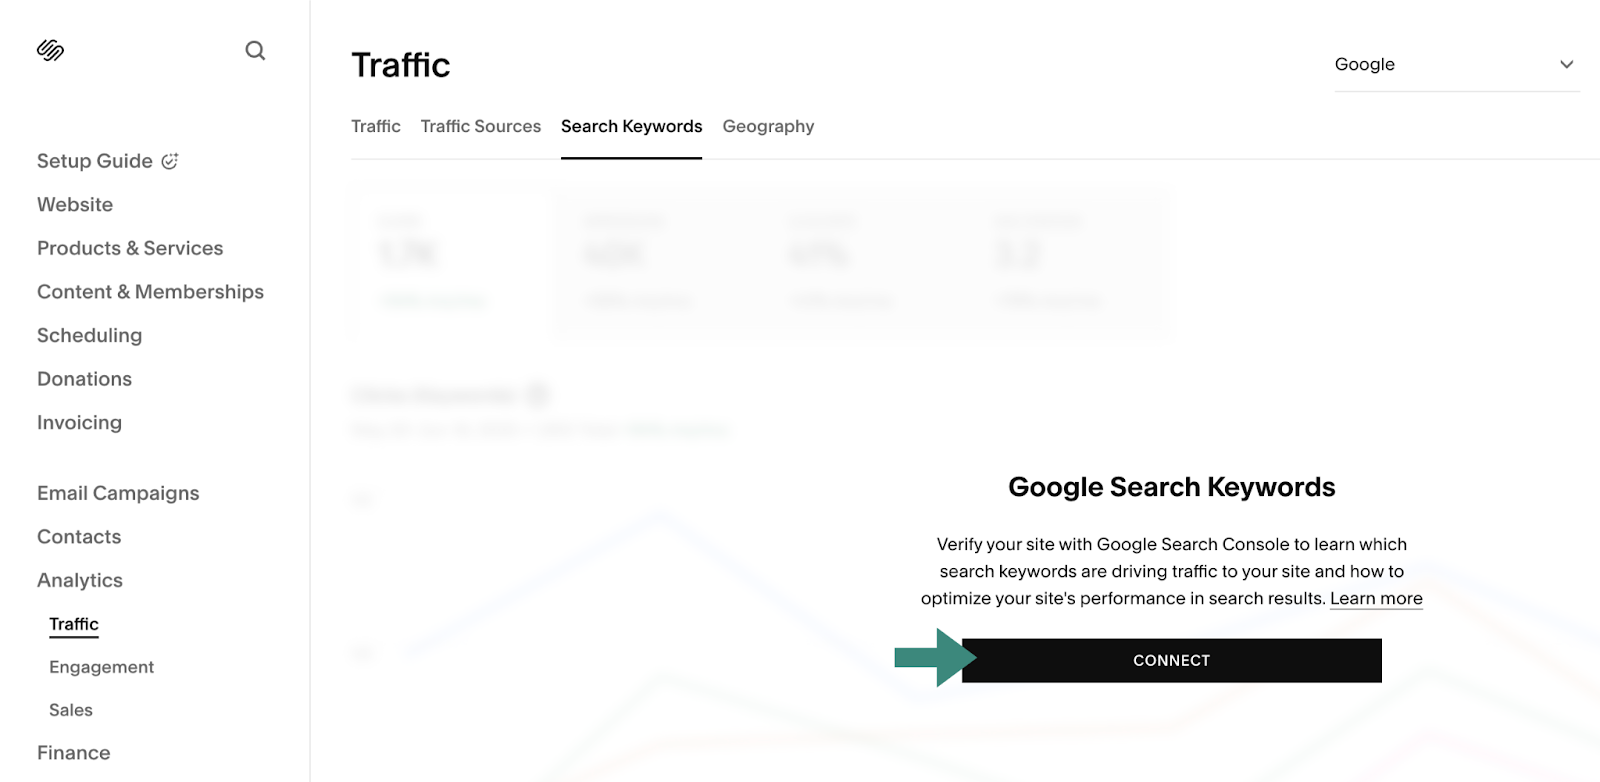
- Click Connect in the panel’s pop-up.
- Log into the Google account you want to connect to your site. If you have multiple Google accounts, ensure you select the correct one.
- Review the permissions, then click Allow.
- Wait 72 hours for the data to populate.
Step 2: Submit Your Sitemap
This is an optional step, but it’s a quick, easy way to help your website get discovered in Google search results faster.
You can find and view your sitemap by adding /sitemap.xml to the end of your domain.
Your site map URL will look like this: https://yourdomain.com/sitemap.xml (replace the bold letters with your site name).
Here’s how to submit your sitemap to Google:
- Go to https://search.google.com/search-console
- Click on sitemaps using the left navigation bar
- Type in “sitemap.xml” after your domain
- Click Submit
If You Have a WordPress Website
Step 1: Set up Google Search Console
- Head to Google Search Console and click Start Now.
- Sign in using your Google account.
- In the upper-left corner of the Google Search Console dashboard, click “Add Property“

- You will be provided with two “property type” options. Select the “URL prefix” method here.
- Enter your full, correct address including https://. Don’t forget the / at the end of the URL, and if your site uses www. make sure to add that as well.
Step 2: Verify Your Site
- Under “Other verification methods” choose the HTML Tag option for verification.
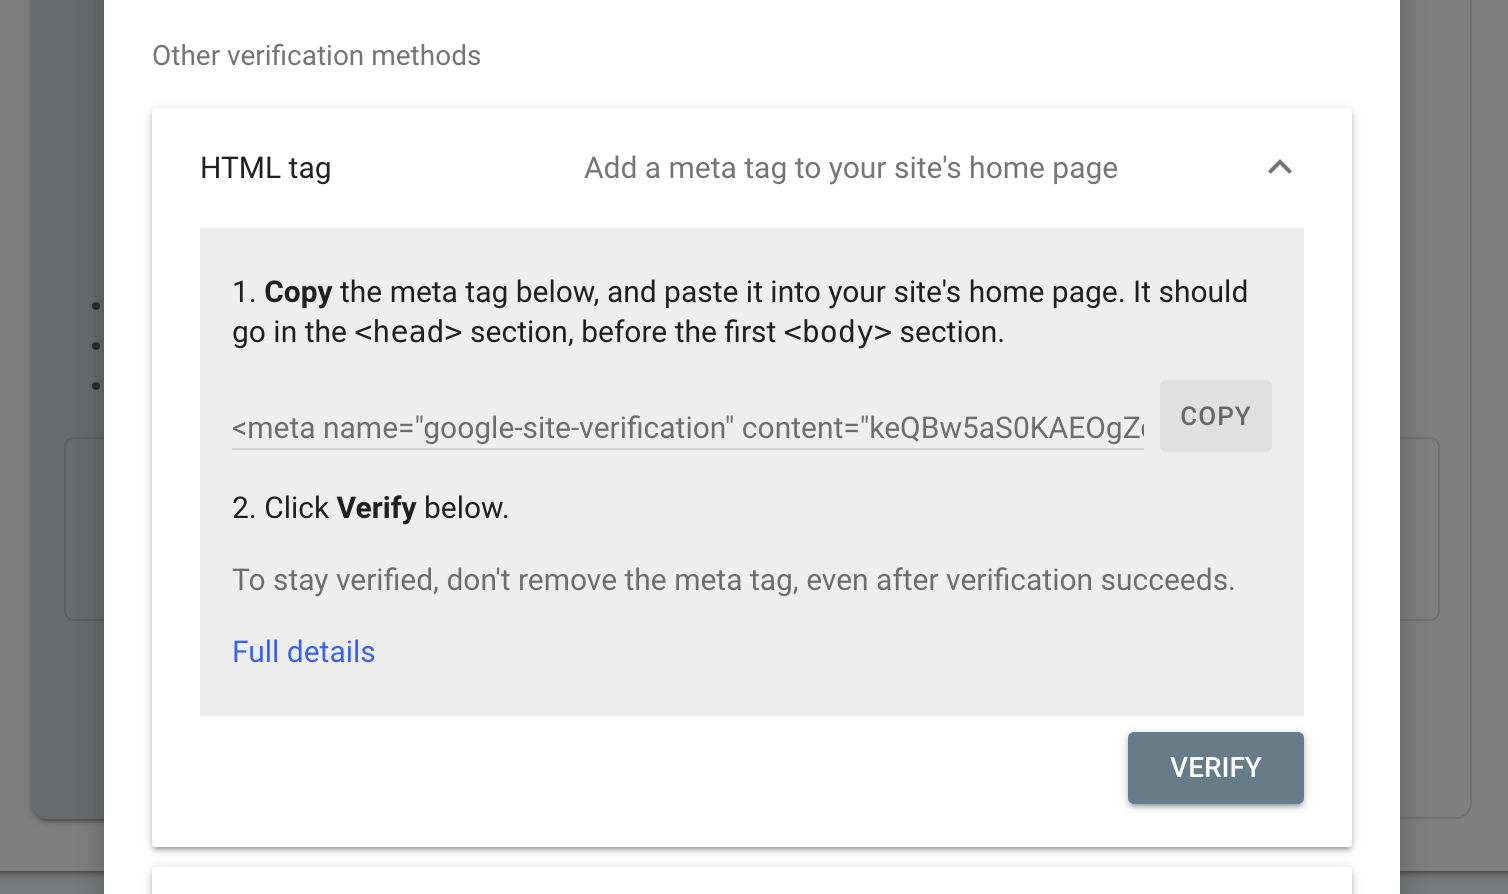
- Copy the meta tag it gives you.
- In your WordPress dashboard, go to the Yoast SEO plugin > Settings
- On the plugin page, go to Site Connections
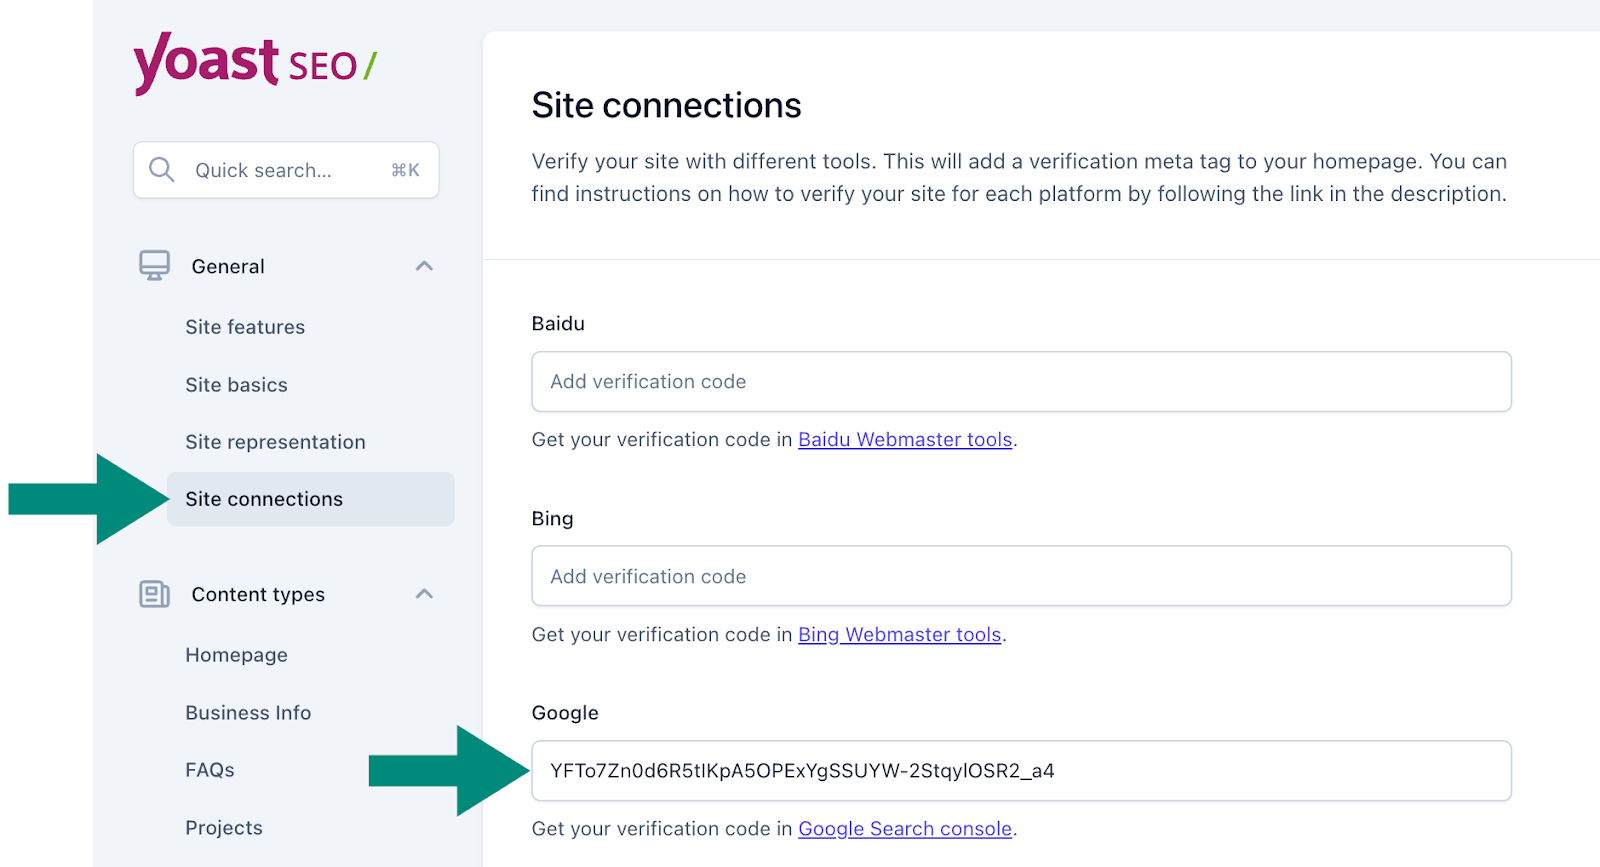
- Under Google, paste the meta tag from Google Search Console
- Click the Save changes button
- Return to Google Search Console and click Verify
Note: If your site doesn’t have the Yoast plugin installed, you can install it by going to Plugins in your WordPress dashboard, click the Add Plugin button at the top of the page, search for “Yoast SEO” and click the “Install Now” button.
Step 3: Submit Your Sitemap
- With Yoast, your sitemap will be at yourdomain.com/sitemap_index.xml.
- In Google Search Console, go to the Sitemaps tab.
- Enter that URL and click Submit.
Ask Google to Index Your Site
Once your sitemap is submitted, Google will start crawling your site on its own, but you can give it a little push – perfect if you’re impatient to show off your new content (we get it).
- In Google Search Console, click on URL Inspection in the sidebar.
- Paste in the link to any new or updated page (like a blog post or service page).
- Click Request Indexing.
You’re All Set!
Connecting to Google Search Console only takes a few minutes, but it can make a big difference in how your site shows up online. It’s like giving Google a personal invitation to explore and index everything you’ve built.